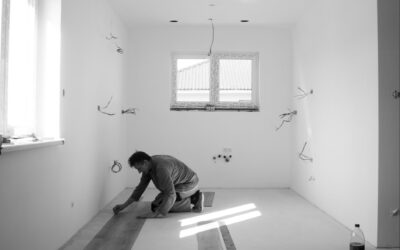
Have you recently looked at your luxury vinyl flooring and noticed it’s looking a little rough? Or maybe you had an accident and dropped something heavy on it resulting in damage? In these instances, many people simply leave it and “make do” with their forlorn flooring.
But what if I told you there was a solution? In this guide, I take a look at how to repair vinyl flooring using DIY solutions. There is a little skill and patience required, but I am confident anyone can make quick repairs if they try!
Repair or Replace – Which is the Best Option
While flooring options like linoleum and carpet are supplied in rolls, the benefit of luxury vinyl flooring is that it’s supplied in planks or tiles. This allows you to take a different approach to repairs and instead of making spot repairs to parts of the floor, it’s much easier to replace an entire tile or plank.
The downside is that you have to keep a stock of spare vinyl flooring for potential replacements which adds to the cost. However, the upside is that the work involved isn’t half as complicated or time-consuming as trying to cut out and spot-fix sections of individual tiles.
Repairing Glue Down LVT Flooring
Glue down LVT flooring offers the benefit of not having to lift multiple tile sections unlike click LVT flooring, but you do need a way to loosen the adhesive.
- Outline the damaged plank and find a matching replacement plank (so the patterns line up properly).
- Use a blow dryer to heat the damaged tile to loosen the adhesive.
- Once sufficiently heated, use a utility knife to cut along the joint lines.
- Remove the damaged LVT tile.
- Prepare the replacement tile and glue it in place.
- Apply pressure on the edges to make sure it is secured.
The main issue here is loosening the adhesive, otherwise, you have to try and prise the tile free while the adhesive is still bonded and this can be a nightmare and cause damage. If you have access to a seam roller I advise using that to roll the joints so that the replacement tile sits flush with the surrounding flooring.
Repairing Click LVT Flooring
When looking at how to repair vinyl flooring, click LVT flooring certainly requires less skill. However, it is more time-consuming:
- Identify the damaged plank and find a matching plank from your stock of spares.
- Find the closest wall to the damaged plank and remove the skirting boards.
- Remove the click LVT flooring row-by-row until you reach the damaged plank.
- Remove the damaged floor piece.
- Click the replacement tile in place.
- Replace the existing floor row-by-row until you reach the wall.
- Replace the skirting boards.
The skill is to find the closest wall to the damaged tile as this results in removing and relaying the least amount of tiles. This means you can avoid lifting and relaying the entire floor!
Once you have relayed the tiles, make sure that the expansion gap is still present between the last row of tiles and the wall (unless the tiles have already expanded).
Tips for Damage Prevention and Maintenance
Over-order when buying luxury vinyl flooring
I know that this means additional expense, but if you order a little more than you need, you have spare tiles for replacements. In the long term, you will typically save due to the larger order quantity and spreading the delivery cost as opposed to trying to order single planks or paying for an entire box when you only need a couple of replacement tiles.
Clean your LVT flooring regularly
As with any type of flooring, regular cleaning and maintenance is the key to minimising damage. Ideally, you should dust, hoover, and mop your LVT flooring weekly and this is one of the simplest in-depth LVT flooring insights I can give. By removing dirt and debris, you eliminate the potential for scrapes and scratches.
Expansion gaps can help with warping and seam damage
A common mistake I see is during installation, people not allowing a sufficient expansion gap between the last row of tiles and the wall. This is imperative because, over time, the tiles can expand and contract with changing temperatures. With no expansion gap, the tiles have nowhere to move and this can cause bowing and bulges.
Only mo your vinyl floor lightly
Most vinyl flooring is either water-resistant or waterproof. However, these things have limits. Therefore, I advise that when mopping your floor, only use a minimum amount of water. Don’t soak the floor. This helps prevent water damage and warping.
Keep Your Vinyl Flooring in Good Condition With DIY Repairs
I hope this guide on how to repair vinyl flooring has given you some inspiration and renewed confidence. As you can see, you don’t have to “make do” with damaged flooring. Instead, by keeping a small stock of luxury vinyl planks or tiles, you can make quick repairs and undo any damage!


