Vinyl click flooring has surged in popularity due to its affordability, durability, and ease of installation – but it is really that easy to install yourself at home? Whether you’re renovating your home or simply giving a room a fresh new look, understanding how to properly install vinyl click flooring can save you time and ensure a flawless finish, without having to pay the excess costs associated with professional installation.
In the following comprehensive guide, we’re going to take you through each step of the installation process, from preparation to the finishing touches, for a seamless and simple DIY installation. Let’s dive in!
Why Choose Vinyl Click Flooring?
Advantages of Vinyl Click Flooring
Vinyl click flooring, also known as luxury vinyl tile (LVT) click flooring, offers a range of benefits that make it an excellent choice for any room in your home. Firstly, its water-resistant properties make it ideal for kitchens, bathrooms, and basements where moisture is a concern, and our LVT click flooring is known for its durability, resisting scratches, dents, and stains, making it perfect for high-traffic areas.
DIY-Friendly Features
One of the most appealing aspects of vinyl click flooring is its DIY-friendly installation process; the click-and-lock mechanism allows the planks to easily snap together without the need for adhesives, meaning you can achieve a professional-looking finish without the professional price tag.
Tools and Materials
Essential Tools
Before you begin, ensure you have the following tools on hand:
- Tape measure
- Utility knife
- Rubber mallet
- Spacers
- Tapping block
- Pull bar
Required Materials
In addition to your vinyl click flooring, you will need:
- Underlayment (if not pre-attached)
- Transition strips
- Baseboards or trim (optional)
Pre-Installation Preparation
Room Inspection and Measurement
First, start by inspecting the room where you’re going to be installing the flooring, and measure the area carefully to determine how much flooring you’ll need. Remember to add an extra 10% to your total to account for waste and mistakes.
Subfloor Evaluation
The subfloor should be flat, dry, and clean, and any unevenness greater than 3/16 inch over a 10-foot span will need to be corrected before installation. If you’re installing over concrete, ensure it’s fully cured and check for moisture issues.
Step-by-Step Installation Guide
Acclimation Period
Next, allow your vinyl flooring to acclimate to the room’s temperature and humidity by placing the unopened boxes in the room, where they’ll be left for at least 48 hours prior to installation.
Layout Planning
You’ll also want to plan your layout carefully: the first row should be parallel to the longest wall, but consider the visual appearance and how the layout will work around obstacles and in doorways.
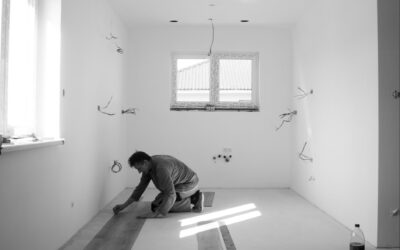
Installation Process
Begin the installation from the left corner of the starting wall and proceed to the right, and place spacers between the wall and the first row of planks to maintain a consistent expansion gap, usually about 1/4 inch.
Cutting and Fitting
You’ll also need to cut planks to fit at the end of rows and around obstacles. Measure and mark the plank, then score it with a utility knife and snap it to break. Use a tapping block and rubber mallet to securely fit the planks together.
Transition Pieces
Next, install transition pieces where your new vinyl flooring meets other types of flooring or to cover expansion gaps at doorways. This not only provides a smooth transition but also protects the edges of your flooring.
Finishing Touches
Baseboards and Trim
Your next step is going to be to reinstall or replace baseboards and trim to cover the expansion gaps around the room’s perimeter. This provides a clean, finished look and helps to hold the flooring in place.
Cleaning and Maintenance
Once installed, clean your new flooring with a damp mop or cloth, making sure to avoid using abrasive cleaners; regular cleaning and immediate spill cleanup will also help maintain the beauty and longevity of your floor.
Troubleshooting Tips
If you encounter planks that won’t click together properly, check for debris in the locking mechanism and ensure that the planks aren’t damaged. If you notice gaps developing between planks after installation, it might be necessary to remove and reinstall affected sections, ensuring they’re still securely locked together.
Final Inspection
Finally, once your installation is complete, conduct a thorough inspection of the floor, and check for any gaps, raised edges, or other imperfections. Addressing these issues promptly will ensure your floor looks great and performs well for years to come. And with that, you’re done!
Ultimately, installing vinyl click flooring can dramatically transform any room in your home – and it’s easy to do at home with some basic DIY skills and elbow grease. And remember, a little preparation goes a long way towards achieving a professional-looking finish. For a wide selection of high-quality vinyl click flooring options, visit our LVT click flooring selection at Flooring Hut.